maternity pants do-it-yourself when I was pregnant with my daughter, I had to buy (or use) a lot of maternity clothes because I gave birth to the summer and used many sarong type skirts under the belly (which has always been high) and I did not care the least to let go off a bit ' belly of the normal t-shirts. This time I give birth in late December, so I guess that will not go out sarongs and bellies as well. not so much one will have to find some solution covering.
 then, I had to do something with my maternity jeans from my first pregnancy, that I will need very often. some designer prenatal chain has combined a disaster with these jeans (although I have another their pants which is handy). apart from the fact that go far, far too high both in front and behind that the horse is a bit 'strange (not shown in this photo), they put that kind of elastic with buttons that you can gradually expand to the belly grows. only that the elastic is too tight and it was folded in, leaving me with a rubber band 1 cm wide that even tries to hold onto a pair of trousers in one of the widest part of the belly. traveling only a meter already beginning to decline. made me go crazy and I had to fix the problem.
luckily, I had seen many tutorials on the web about how to change my pants with a little normal 'on a jersey or a shirt and an old rubber band off. are wonderful and very easy to do. For example, here , here, here , here, here , here and here . but I did not own to use another rubber band that could always make the same order as in my jeans, folded, and so I followed more or less that other tutorial without elastic, with some modifications. 
1. is a t-shirt jersey that you do not need more. I chose the one that was polyester (so bad it was made very soon) and too short. remove the edge stitched bottom and then makes a cut under his armpits.
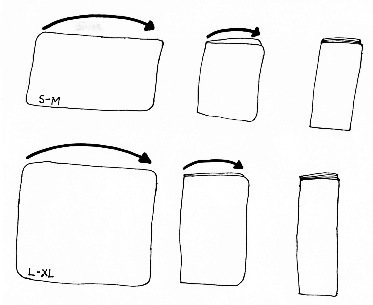
 2. striped t-shirt inside out, cut a strip one side (preferably from the label side) and sew again. serger machine is perfect for this project, but you can also use a normal machine with zig zag and a needle tip with the ball (the jersey). bend the strip in half (as pictured below) and test around the belly. the rather narrow because it will want to hold up the pants. the first time I went too wide, so I cut it even closer. I should make it even closer, to tell the truth, but does nothing.
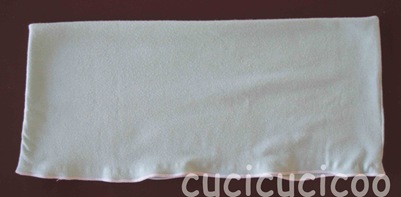 3. when it is close enough for the belly, fold in half with the good side out. I passed back into the machine serger to keep the edges together to the next part, but it is not necessary. you have something like a circle of two layers of jersey.
 4. ora il pantalone. prendi qualunque pantalone che hai che non ti servirà più quando avrai di nuovo il tuo profilo normale e togli la parte superiore. bisognerà tagliare abbastanza in basso davanti e togliere lo zip se c’è. per questo, vi consiglio di guardare le foto nei tutorial che ho già segnalato sopra perché, avendo un jeans già premaman, l’ho tagliato in modo diverso e lo zip è finto (e anche le tasche, una cosa che mi dà molto fastidio!). anche se, mi sono resa conto dopo che dovevo tagliare ancora più in basso davanti nonostante fosse già un modello premaman, quindi ho tolto quello che avevo cucito e l’ho abbassato ancora (ma non ho fatto la foto the final cut). then try the pants. should be a bit 'under the belly. if he does so, it cuts lie ahead.

5. puts on his pants and jersey inside the circle is matching the cut edges / of the two fabrics sewn. is a bit 'annoying because the pants will be much larger than the jersey, but pulls the jersey in order to determine the fabric with pins at regular intervals.
 6. then sew it all together. again, but I used overlock machine, but you can do with a normal sewing machine. curl is a bit ', but no matter.
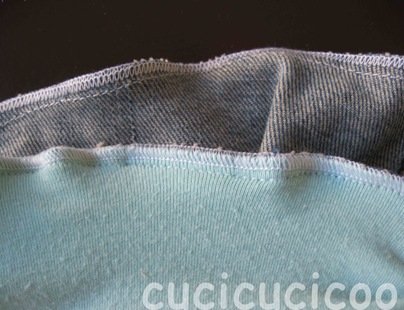 7. Board to be a zig zag (or serger) along the edges of the cloth to keep them together and so as not to unravel the fabric of the pants (not unravel the jersey). then to make it more durable, I did the right point just below.
 8. pulls on the jersey, and you're done!
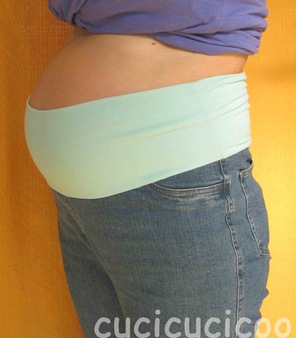 can carry with them the jersey up to give support to the belly ...
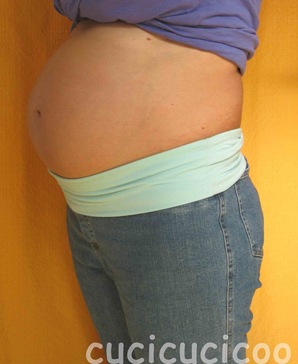 ... or as I prefer, dropped the jersey. much better than jeans before!
normally cover the range of maternity shirts jersey, but if they do not, however, gives the effect of a kind belt scarf or something. I have used my jeans altered several times and I am very happy!




 sto passando un periodo difficile con mia figlia. sta trascorrendo una fase molto disubbidiente e si sta comportando in generale in modo un po’ strano. sto cominciando ad impazzirmi con la situazione e a dubitare le mie capacità, ma poi vengono quei momenti che make me break out the heart of an intense love. and this is one of those moments.
  anyone know how good parent when his son became fond of his account of something that already passionate about the parent. has for some time that my daughter really like poking my entire collection of fabrics and expressing the desire to learn to sew too.


